Wine Rack Plans PDF: A Comprehensive Guide
Discover a wealth of free and premium wine rack plans in PDF format, offering diverse designs for every skill level and storage need․
Explore plans from Craftsmanspace, DIY Network, and Woodcraft Magazine, alongside options for customization and advanced cellar projects․
Wine rack plans, particularly those available in PDF format, represent a fantastic starting point for both novice and experienced woodworkers seeking to create stylish and functional wine storage solutions․ These plans offer detailed instructions, materials lists, and visual diagrams, simplifying the construction process․
PDF plans provide accessibility and convenience, allowing builders to easily print and reference the designs throughout the project․ From simple, space-saving wall-mounted racks to elaborate, temperature-controlled cellars, a diverse range of plans cater to varying needs and aesthetic preferences․ DIY enthusiasts can find plans for modular, freestanding, and even hidden wine storage options․
Why Use PDF Plans for Wine Rack Construction?
PDF plans offer unparalleled convenience and accessibility for wine rack construction․ They are easily downloadable, printable, and viewable on various devices, eliminating the need for cumbersome paper blueprints․ Detailed diagrams and step-by-step instructions ensure clarity, even for beginners․
PDF format preserves the plan’s integrity, maintaining accurate dimensions and scale․ This is crucial for precise cutting and assembly․ Furthermore, PDF plans are often readily available for free or at a low cost, making them an economical choice for DIY projects․ They streamline the building process, reducing errors and saving time․

Types of Wine Rack Plans Available in PDF Format
Explore diverse PDF plans, including wall-mounted, countertop, freestanding, modular, and even hidden designs, catering to various spaces and preferences․
Wall-Mounted Wine Rack Plans
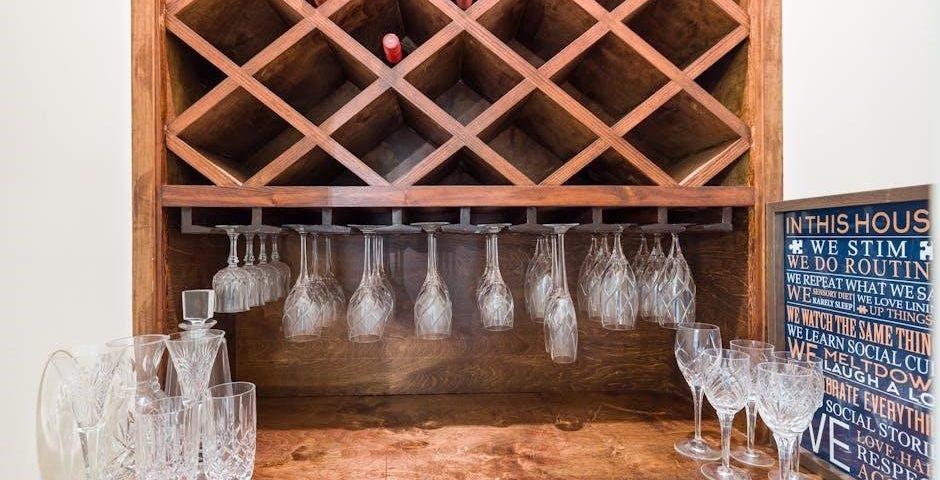
Wall-mounted wine rack PDF plans are ideal for maximizing space, particularly in smaller kitchens or dining areas․ DIY Network and other resources offer designs ranging from simple, single-bottle holders to elaborate systems capable of storing dozens of bottles․
These plans often emphasize secure mounting to wall studs, ensuring stability and safety․ Step-by-step instructions detail marking stud locations and utilizing appropriate fasteners․ Many designs incorporate features like glass holders, adding functionality and style․ Consider the weight capacity of your wall before installation!
Countertop Wine Rack Plans
Countertop wine rack PDF plans provide convenient access to your favorite wines, perfect for kitchens or bars․ These plans typically focus on compact designs, often utilizing simple joinery techniques, making them suitable for beginner woodworkers․
You’ll find plans for racks holding a few bottles to those accommodating up to six or more․ Many designs incorporate slots for wine glasses, enhancing functionality․ Woodcraft Magazine offers plans for elegant, platform-style racks․ Prioritize a stable base and consider a protective finish to prevent spills․
Freestanding Wine Rack Plans
Freestanding wine rack PDF plans offer flexibility in placement, ideal for any room without requiring mounting․ These plans range from simple, box-style racks to more elaborate designs with multiple tiers and decorative elements․ Craftsmanspace provides a modular option, allowing customization of size and capacity․
Consider the weight distribution for stability, especially with larger racks․ Plans often detail robust construction techniques to prevent wobbling․ Choose durable wood and a suitable finish to complement your décor and protect against spills․
Modular Wine Rack Plans
Modular wine rack PDF plans provide exceptional versatility, allowing you to build and expand your storage as your collection grows․ Craftsmanspace is a key resource, offering downloadable plans for customizable, interlocking units․ These systems often feature standardized dimensions for easy addition of new modules․
Consider the joinery methods detailed in the plans – strong connections are crucial for supporting weight․ Modular designs are excellent for adapting to changing spaces and offer a personalized storage solution․
Hidden/Concealed Wine Rack Plans
PDF plans for hidden wine racks cater to those desiring discreet storage solutions․ These designs often integrate into existing furniture or walls, maximizing space and concealing your collection․ Expect plans detailing construction within cabinets, under stairs, or behind decorative panels․
Careful measurement and precise execution are vital for seamless integration․ Consider access and ventilation when reviewing plans, ensuring easy retrieval and proper bottle preservation․ These plans prioritize aesthetics and functionality․
Essential Materials for Building Wine Racks
Successful wine rack construction relies on quality materials like wood (pine, oak, redwood), screws, nails, and robust wood glue for lasting stability․
Finishing options include stain, varnish, and polyurethane to protect and enhance the wood’s natural beauty․
Wood Selection (Pine, Redwood, Oak)
Choosing the right wood is crucial for both aesthetics and durability․ Pine is an affordable and easily workable option, ideal for painted racks, but less resistant to moisture․
Redwood offers natural resistance to decay and insects, making it suitable for cellars, though it’s pricier․ Oak, particularly white oak, is the premium choice – strong, beautiful, and naturally water-resistant, perfect for showcasing wine collections․
Consider wood thickness; 1x wood is commonly used, but dimensions can vary․ Always check your PDF plans for specific recommendations based on the design and intended load․
Fasteners (Screws, Nails, Wood Glue)
Secure assembly relies on appropriate fasteners․ Screws provide superior holding power compared to nails, especially for load-bearing joints, and are recommended for most wine rack builds․
Wood glue is essential for creating strong, lasting bonds, enhancing stability alongside mechanical fasteners․ Use a quality wood glue designed for the chosen wood type․
Refer to your PDF plans for specific fastener sizes and types; pre-drilling pilot holes prevents splitting, ensuring a clean and robust construction․
Finishing Materials (Stain, Varnish, Polyurethane)
Enhance the beauty and durability of your wine rack with appropriate finishing materials․ Stain alters the wood’s color, highlighting its grain, while varnish and polyurethane provide protective coatings․
Polyurethane offers superior resistance to scratches and moisture, ideal for environments with temperature fluctuations․ Always apply finishes according to manufacturer instructions, ensuring proper ventilation․
Consult your PDF plans for recommended finishes; multiple coats provide increased protection and a professional appearance․ Sand lightly between coats for a smooth, even result․

Tools Required for Wine Rack Construction
Essential tools include saws, jigsaws, drills, screwdrivers, tape measures, and sandpaper․ PDF plans often detail specific tool requirements for accurate cuts and assembly․
Cutting Tools (Saw, Jigsaw)
Precise cuts are paramount when building wine racks from PDF plans, making the right cutting tools indispensable․ A standard hand saw or circular saw is suitable for straight cuts on larger wood pieces, ensuring accurate dimensions as specified in the plans․
However, a jigsaw proves invaluable for crafting curved shapes or intricate bottle slots․ PDF plans often include templates; a jigsaw allows for their faithful reproduction․ Selecting blades appropriate for the wood type—fine-tooth for hardwoods, coarser for softwoods—guarantees clean, splinter-free edges, enhancing the final product’s aesthetic and structural integrity․
Drilling & Fastening Tools (Drill, Screwdriver)
Accurate assembly, guided by PDF wine rack plans, relies heavily on effective drilling and fastening․ A power drill is essential for creating pilot holes, preventing wood splitting when driving screws․ Variable speed settings offer control for different wood types and screw sizes․
A screwdriver – either manual or powered – securely fastens the components․ PDF plans will specify screw lengths and types; using the correct fasteners ensures a robust, long-lasting structure; Countersinking bits create flush finishes, enhancing the rack’s appearance․
Measuring & Marking Tools (Tape Measure, Pencil)
Precise execution of PDF wine rack plans begins with accurate measurements․ A reliable tape measure is crucial for transferring dimensions from the plans to the wood, ensuring components fit together seamlessly․ Double-checking measurements minimizes errors and wasted material․
A sharp pencil allows for clear and accurate marking of cut lines and drill points․ PDF plans often include detailed diagrams; transferring these accurately requires legible markings․ A marking gauge can assist with consistent line placement for repetitive cuts․
Sanding & Finishing Tools (Sandpaper, Brush)
Achieving a professional finish on your PDF-built wine rack requires appropriate sanding and finishing tools․ Sandpaper, in various grits, smooths rough edges and prepares the wood for stain or varnish․ Start with coarser grits and progress to finer ones for optimal results․
A quality brush is essential for applying finishing materials evenly․ Consider the type of finish – water-based or oil-based – when selecting a brush․ Proper application enhances the wood’s beauty and protects it from moisture and wear․
Step-by-Step Guide to Building a Basic Wine Rack (Based on PDF Plans)
Follow your chosen PDF plan’s instructions, starting with wood preparation, cutting pieces accurately, assembling the frame, and creating bottle slots․
Finish with sanding and staining for a beautiful, functional wine rack․
Preparing the Wood According to the Plan
Begin by carefully reviewing your PDF wine rack plan’s material list and cutting diagram․ Select the specified wood – pine, redwood, or oak – ensuring it’s straight and free of knots․ Measure and mark each piece according to the plan’s dimensions, using a sharp pencil for accuracy․
Inspect the wood for any imperfections and address them with sanding before cutting․ Acclimate the wood to your workspace for a few days to minimize warping․ Double-check all measurements before proceeding to the cutting stage, as precise cuts are crucial for a stable and aesthetically pleasing wine rack․
Cutting the Wood Pieces
Utilize a saw or jigsaw, as indicated in your PDF plan, to precisely cut the wood pieces according to the marked dimensions․ Prioritize safety by wearing safety glasses and using appropriate cutting techniques․ Ensure clean, straight cuts for tight-fitting joints․
Follow the cutting diagram closely, labeling each piece as you cut it to avoid confusion during assembly․ Sand the cut edges to remove splinters and create a smooth surface․ Verify the accuracy of each cut against the plan before moving on to the next piece, guaranteeing a well-constructed wine rack․
Assembling the Frame
Begin assembling the wine rack frame using wood glue and screws or nails, as specified in your PDF plans․ Ensure square corners and alignment during this stage, utilizing clamps to hold pieces securely while the glue dries․
Double-check measurements and connections to maintain structural integrity․ Pre-drilling pilot holes will prevent wood splitting․ Reinforce joints for added stability, especially for larger or wall-mounted racks․ A solid frame is crucial for supporting the weight of the wine bottles․
Creating Bottle Slots
Carefully mark and cut the bottle slots according to the PDF plan’s dimensions, ensuring they accommodate your desired bottle size․ Utilize a jigsaw or other appropriate cutting tool for precise openings․ Smooth the edges of the slots with sandpaper to prevent label damage․
Test the fit with a bottle to confirm accuracy․ Adjust slot sizes if necessary, remembering that a snug but not overly tight fit is ideal․ Consistent slot spacing contributes to the rack’s aesthetic appeal and functionality․
Finishing and Staining the Wine Rack
Prepare the wine rack surface by sanding it smooth, removing any splinters or rough edges․ Apply your chosen finish – stain, varnish, or polyurethane – following the manufacturer’s instructions․ Staining enhances the wood’s natural grain, while protective coatings add durability․
Allow each coat to dry completely before applying the next, and lightly sand between coats for a flawless finish․ Consider multiple coats for increased protection and a richer appearance․ Ensure proper ventilation during application and drying․

Finding Free Wine Rack Plans in PDF Format
Access complimentary plans from Craftsmanspace, DIY Network, and Woodcraft Magazine, offering diverse designs readily available as downloadable PDF files․
Craftsmanspace PDF Plans
Craftsmanspace provides a free, downloadable PDF file featuring plans for a highly customizable, modular wine rack system․ This allows builders to adapt the design to their specific space and bottle storage requirements․
The plans are detailed, offering clear instructions for assembly and modification․ Users can expand or contract the rack’s size, creating a solution perfectly tailored to their collection․
This resource is ideal for those seeking a flexible and adaptable wine storage solution, offering a solid foundation for a personalized project․
DIY Network Resources
DIY Network offers a collection of wine rack plans, often including visual guides and step-by-step instructions suitable for various skill levels․ These resources frequently showcase different styles, from simple countertop racks to more elaborate wall-mounted designs․
You can typically download PDF plans directly from their website, providing a convenient way to access building diagrams and material lists․
DIY Network’s plans emphasize practical construction techniques, making them accessible for home woodworking enthusiasts․
Woodcraft Magazine Plans
Woodcraft Magazine provides access to a curated selection of classic woodworking projects, including detailed wine rack plans available for download․ These plans often represent the best projects featured in past issues, offering proven designs and clear instructions․
Expect to find PDF files containing measured drawings, materials lists, and exploded views to guide your build․
Woodcraft’s plans are known for their quality and precision, appealing to experienced woodworkers․

Customizing Your Wine Rack Plans
Adapt PDF plans to fit your bottles, add glass holders or shelves, and modify designs to match your aesthetic preferences for a unique rack․
Adjusting Dimensions for Bottle Size
Ensuring a perfect fit requires careful consideration of bottle dimensions․ Standard wine bottles vary slightly, so measure your collection to determine the largest diameter․ PDF plans often provide standard sizes, but adjusting the slot width and depth is crucial for accommodating larger formats like Magnums or Burgundies․
Increase slot dimensions by a few millimeters to prevent bottles from getting stuck․ Remember to adjust height as well, especially for taller bottles․ Precise measurements and minor modifications to the PDF plan will guarantee a secure and aesthetically pleasing display for your entire wine collection․
Adding Features (Glass Holders, Shelves)
Enhance your wine rack’s functionality by incorporating features like glass holders or additional shelves․ PDF plans can be modified to include dedicated slots for wine glasses, positioned above or alongside bottle storage․ Consider adding small shelves for decanters or displaying favorite labels․
Carefully plan the placement to maintain structural integrity and aesthetic balance․ Ensure sufficient clearance for easy access․ Integrating these additions requires adjustments to the original PDF plan, potentially adding extra wood and fasteners․ Thoughtful design elevates your wine rack beyond simple storage․
Modifying Design for Aesthetic Preferences
PDF wine rack plans offer a fantastic base for personalization․ Adjust the design to match your home décor by altering wood types, stain colors, or overall shape․ Consider incorporating decorative elements like curved edges or unique bottle slot arrangements․
Experiment with different finishes – varnish, polyurethane, or paint – to achieve the desired look․ Remember to maintain structural soundness when making aesthetic changes․ Minor alterations to the PDF plan can dramatically transform the rack’s appearance, creating a truly custom piece․

Advanced Wine Rack Designs & Plans
Unlock plans for temperature-controlled racks and large-capacity wine cellars in PDF format, demanding skilled woodworking and detailed construction knowledge․
Temperature-Controlled Wine Rack Plans
Designing a temperature-controlled wine rack requires PDF plans incorporating insulation, cooling systems, and precise ventilation․ These advanced plans often detail building a sealed enclosure, crucial for maintaining consistent temperatures – ideally between 55°F and 65°F – vital for long-term wine preservation․
Look for plans specifying materials like closed-cell foam insulation, vapor barriers, and refrigeration units designed for wine cellars․ Detailed diagrams will illustrate proper airflow and humidity control, preventing mold and ensuring optimal bottle storage conditions․ Consider plans that integrate digital temperature controllers for precise adjustments․
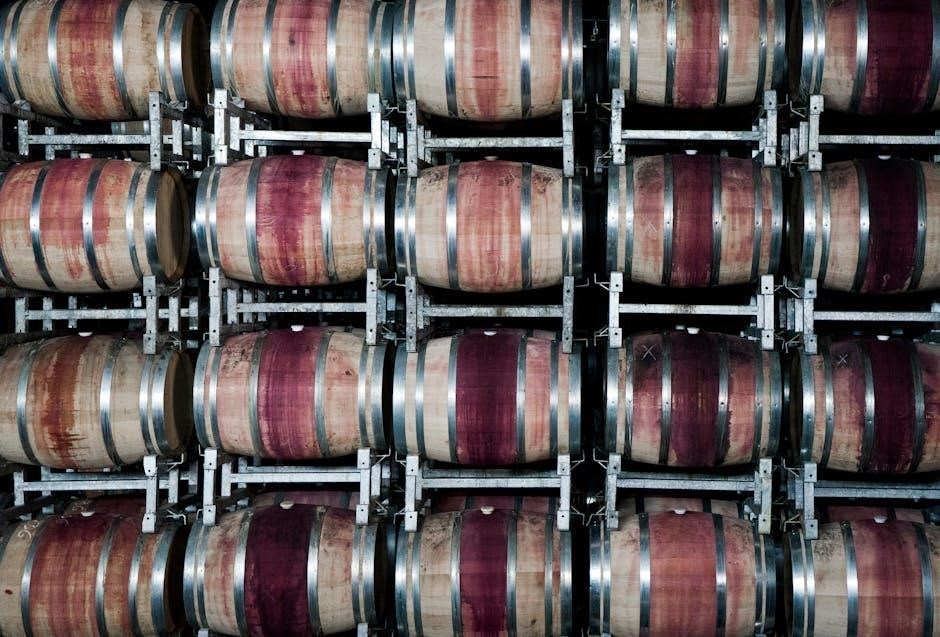
Large Capacity Wine Cellar Plans
PDF plans for large capacity wine cellars focus on maximizing storage within a dedicated space, often a basement or room․ These plans detail structural considerations, including wall construction, flooring, and ceiling height, to accommodate substantial wine collections – potentially holding hundreds or even thousands of bottles․
Expect to find detailed layouts illustrating racking systems, including custom designs, modular units, and potentially gravity-fed systems․ Plans will emphasize proper insulation, vapor barriers, and climate control to maintain ideal wine storage conditions․ Consider plans that incorporate tasting areas or display features․

Safety Considerations When Building Wine Racks
Prioritize woodworking safety – wear eye protection and use tools correctly․ Ensure proper ventilation when staining or finishing․ Securely mount wall racks to studs․
Woodworking Safety Practices
Always wear appropriate safety glasses or goggles to protect your eyes from flying debris during cutting, drilling, and sanding operations․ Utilize dust masks or respirators, especially when working with wood finishes, to avoid inhaling harmful particles․ Ensure your workspace is well-lit and free of clutter to prevent trips and falls․
Never operate power tools when fatigued or under the influence of medications․ Keep fingers clear of blades and bits, and always use push sticks or clamps to secure workpieces․ Disconnect power tools before changing blades or making adjustments․ Familiarize yourself with the safety features of each tool before use, and follow manufacturer’s instructions diligently․
Proper Ventilation
Adequate ventilation is crucial when building wine racks, particularly during finishing stages․ Stains, varnishes, and polyurethanes release volatile organic compounds (VOCs) that can be harmful if inhaled․ Work in a well-ventilated area, ideally with open windows and doors, or utilize a fan to circulate air․
Consider wearing a respirator with appropriate filters when applying finishes, even with ventilation․ Avoid working in enclosed spaces without sufficient airflow․ Proper ventilation not only protects your health but also ensures a smoother, more even finish on your wine rack project․
Secure Mounting of Wall-Mounted Racks
Wall-mounted wine racks require robust and secure installation to prevent accidents and damage․ Always locate wall studs using a stud finder before attaching the rack․ Use screws of appropriate length and gauge designed for wall mounting, ensuring they penetrate deeply into the studs․
Avoid relying solely on drywall anchors, especially for heavier racks․ Consider using a level to ensure the rack is perfectly horizontal during installation․ Regularly inspect the mounting hardware for any signs of loosening or wear, and tighten as needed for continued safety․

Resources for Purchasing Wine Rack Plans
Explore online marketplaces like Etsy and Amazon, plus specialty woodworking plan websites, to find detailed PDF wine rack plans for purchase․
Discover a wide range of designs, from simple to elaborate, catering to various skill levels and aesthetic preferences․
Online Marketplaces (Etsy, Amazon)
Etsy and Amazon present extensive collections of wine rack plans available in PDF format, crafted by independent designers and woodworking enthusiasts․ Discover a diverse array of styles, ranging from rustic farmhouse designs to modern, minimalist aesthetics, all readily downloadable․
Benefit from user reviews and ratings to gauge plan quality and clarity before purchasing․ Expect to find plans catering to various skill levels, from beginner-friendly projects to complex builds for experienced woodworkers․ Prices vary considerably, offering options to suit different budgets․ Consider checking for instant download options for immediate access to your chosen plans․
Specialty Woodworking Plan Websites
Dedicated woodworking plan websites frequently offer curated selections of wine rack plans in PDF format, often with a focus on detailed instructions and professional-quality designs․ Explore sites specializing in furniture plans, as wine racks often fall within their project offerings․
Expect to find plans with comprehensive materials lists, cutting diagrams, and step-by-step assembly guides․ Many sites offer both free and paid plans, with premium options typically providing more intricate designs and advanced features․ Look for websites with strong customer support and a proven track record of reliable plans․

Downloading and Printing PDF Plans
Ensure accurate scale when downloading PDF plans; verify dimensions before printing․ Select appropriate paper size and print settings for clear, usable diagrams․
Ensuring Correct Scale and Dimensions
Prior to commencing construction, meticulously verify the scale of your downloaded PDF wine rack plans․ Confirm that all dimensions accurately reflect your desired final product size․ Utilize the plan’s scale indicator, if provided, or print a test page with a known measurement to check for discrepancies․
Incorrect scaling can lead to ill-fitting pieces and a structurally unsound wine rack․ Double-check critical measurements like bottle slot widths and overall frame dimensions․ Adjust your printer settings if necessary to ensure a 100% accurate reproduction of the plan․
Paper Size and Print Settings
When printing your PDF wine rack plans, select the appropriate paper size – typically 8․5 x 11 inches or A4 – to avoid cropping or distortion․ Ensure your printer is set to “Actual Size” or “100% Scale” within the print dialogue box․ Avoid options like “Fit to Page,” as these will alter the dimensions․
Consider using a high-quality print setting for clear, legible lines and diagrams․ For large plans spanning multiple pages, verify that page order is correct and that registration marks align properly during assembly․
Troubleshooting Common Wine Rack Building Issues
Address wobbles with bracing, adjust slot sizes for proper fit, and resolve finishing flaws by reapplying stain or varnish, following plan details․
Wobbly Construction
A wobbly wine rack often stems from uneven flooring or insufficient bracing within the frame itself․ Carefully re-examine your PDF plans to ensure all connecting pieces are securely fastened with both screws and wood glue․ Consider adding corner braces or a back panel to enhance stability, particularly for freestanding designs․
Check that all wood pieces were cut accurately according to the plan’s dimensions; even slight discrepancies can accumulate and cause instability․ If the floor is uneven, use shims under the rack’s base to level it․ Reinforcing joints with additional fasteners can also significantly improve structural integrity․
Incorrect Bottle Slot Sizes
If bottles don’t fit snugly, or are too loose, double-check your cutting measurements against the PDF plan’s specifications․ Slight variations in slot width can occur due to saw blade thickness or inaccurate marking․ Test the slot with a bottle before completing all cuts, adjusting the plan if necessary․
Remember to account for bottle neck variations; some bottles have wider necks than others․ Consider creating a slightly larger slot as a starting point, then refining it if needed․ Precise measurements and careful cutting are crucial for a functional wine rack․
Finishing Problems
Uneven stain or varnish application can detract from your wine rack’s appearance․ Ensure proper surface preparation – sanding thoroughly is key for adhesion․ Apply finish in thin, even coats, following the grain of the wood․ Allow each coat to dry completely before applying the next․
If experiencing blotchiness, consider using a wood conditioner before staining․ Test your chosen finish on a scrap piece of wood to preview the color and ensure compatibility․ Proper ventilation is vital during finishing, and always follow manufacturer’s safety guidelines․